
Rancher OS - The perfect place to run Docker
On my quest to learn more about Docker I came across Rancher OS. I had herd (cheeky) of it a while back but it was only yesterday evening when I decided to sit down and actually take a look and read what it's all about.
Its essentially a 20MB Linux distro which runs the entire OS as Docker containers, called system containers. One of these system containers is Docker, this is for user containers and where you can run your own containers.
How does it work
Rancher Overview
Above shows how Rancher OS works. The first process the kernel starts is the "System Docker", this starts containers for various system services such as NTP, DHCP, Syslog and the console but it also runs a container which is a separate Docker daemon known as "User Docker". Here all user containers are run and destroyed and do not impact the System Docker.
So I am running my Rancher OS ion an old machine for testing, there are various ways to get up and running, But for me all I needed was the RancherOS.iso that you can download from rancherOS here
Once you have the ISO dd the contents on a usb or a Linux VM and make sure you give it at least 1024MB of RAM if you plan on installing it to disk as per Ranchers recommendation. Make sure the VM you create via its network configuration has internet access as the OS will pull the latest Rancher OS.
Attach the ISO and boot. Once up you need to create a cloud-config.yml:
$ sudo vi cloud-config.yml
Then inside the config, add your SSH key:
ssh_authorized_keys:
  -  ssh-rsa AAA...
In "ssh-rsa AAA..." Add your public SSH key
Save and that should be enough to allow you to access your RancherOS server once it is installed.
So to install to disk, you need to do the following:
$ sudo ros install -c cloud-config.yml -d /dev/sda
You should see something like the following, essentially it copies the cloud-config.yml to /var/lib/rancher/config and pulls the latest rancher/os Docker image:
 sudo ros install -c cloud-config.yml -d /dev/sda
INFO[0000] No install type specified...defaulting to generic
Installing from rancher/os:v0.5.0
Continue [y/N]: y
Unable to find image 'rancher/os:v0.5.0' locally
v0.5.0: Pulling from rancher/os
6d3a6d998241: Pull complete
606b08bdd0f3: Pull complete
1d99b95ffc1c: Pull complete
a3ed95caeb02: Pull complete
0c24bc6a8a84: Pull complete
c2b88384fd96: Downloading [====>                                              ]  3.76 MB/41.26 MB
f79f8e35898f: Download complete
c2b88384fd96: Downloading [=====>                                             ] 4.594 MB/41.26 MB
Once finished it will ask you to continue with reboot, hit y and it will reboot.
Once its back up it should print the following:
docker-sys: <Docker IP> eth0: <IP your environment assigns> lo: 127.0.0.1
By printing the IP assigned to eth0 you can SSH straight away from a machine which has a matching private SSH key to the public key you entered into your cloud-config file:
$ ssh rancher@<IP your environment assigns>
Discovery
As mentioned earlier now its up and running we can take a look at the two Docker daemons running. So as normal you can do:
$ docker ps
You will see the familiar docker response, this is our User Docker daemon:
CONTAINER ID IMAGE COMMAND CREATED STATUS PORTS NAMES
Install the RancherOS server
Login to the VM with one of the SSH keys configured above and then use the following command to install the server (where 1.2.3.4 is the VM IP address configured in the cloud-config.yml above).
sudo docker run -d --restart=always -p 8080:8080 rancher/server
Configuring Rancher
After a few minutes, you will have a Rancher Server running on port 8080 of the IP address you specified. Fixing the IP address of the Rancher server is important as this is where any hosts agents that we deploy will need to point to.
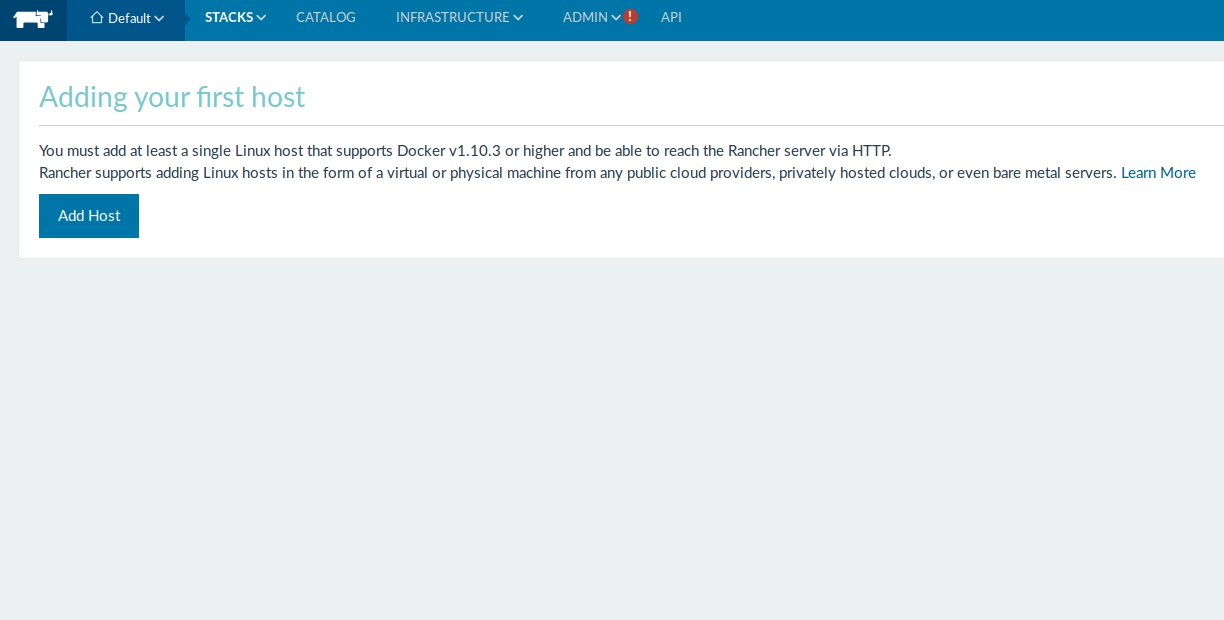
After logging into the Rancher Server, go to “add host” and generate the custom agent command.
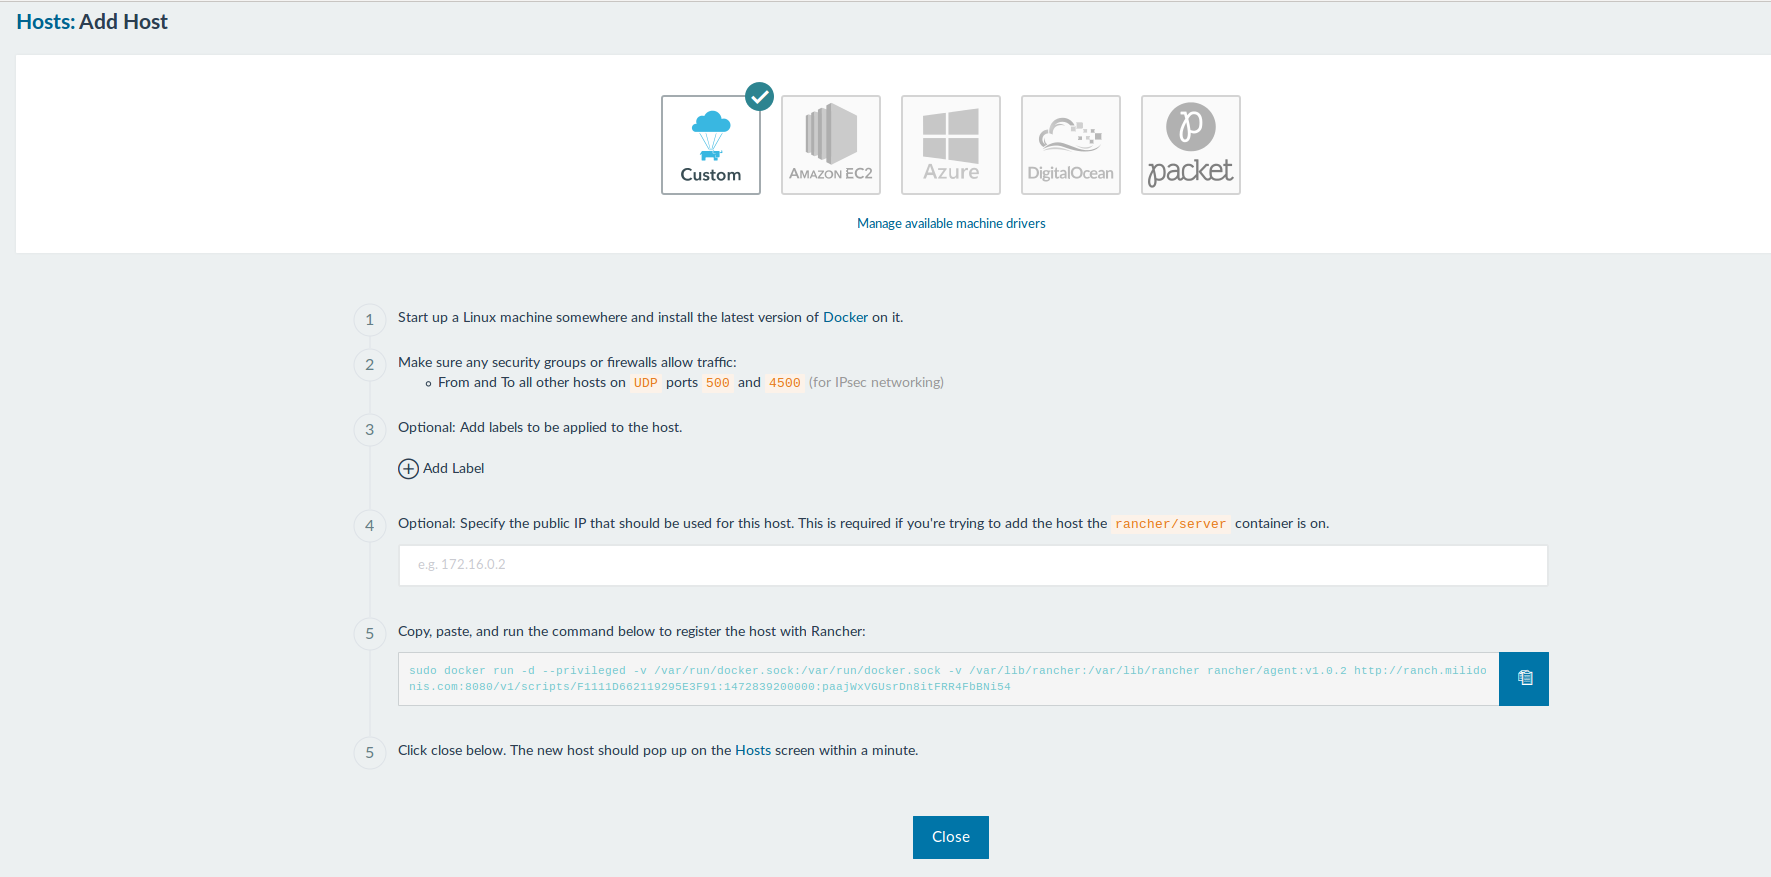
Copy it and keep it as we are going to use it to add a host.
In my case the host will actually be the same server running RunchOS
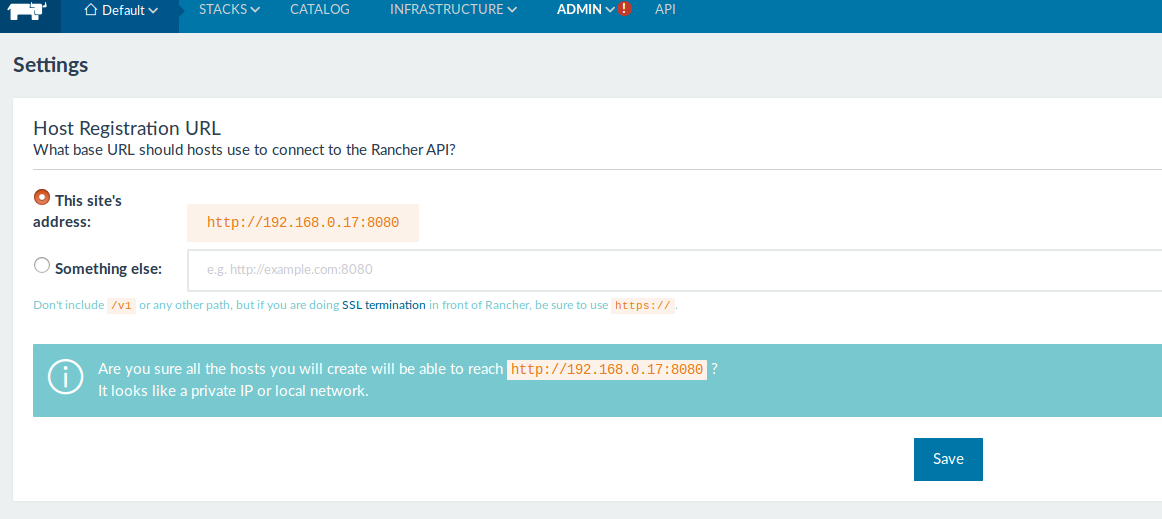
Make sure than in settings you have your private ip.
The command generated is in the format is in the format
sudo docker run -d --privileged -v /var/run/docker.sock:/var/run/docker.sock -v /var/lib/rancher:/var/lib/rancher rancher/agent:v1.0.2 http://192.168.0.17:8080/v1/scripts/F1111D64fXXXXXXXXXX200000:pa
After a minute or so you will notice your host is detected
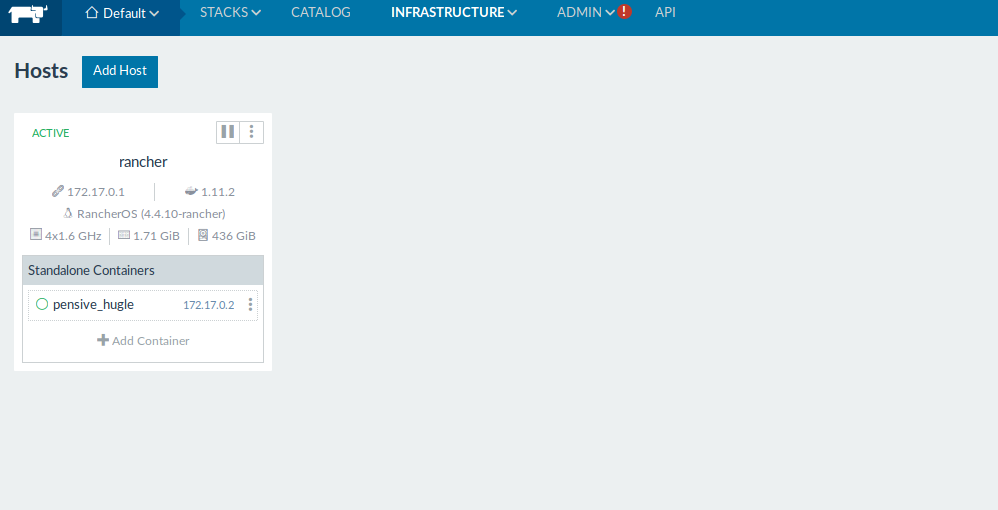
That's it you can go and add containers .